The Qubitro and Golioth integration allows you to sync all devices and their data from the Golioth Cloud to Qubitro—without writing any code.
Once your hardware is configured and sending data to Golioth, a corresponding device is automatically created in Qubitro, including its unique platform IDs. Qubitro also decodes the incoming data, and transformation functions can be applied if modifications are needed before storage.
Prerequisites
Create an Integration in Qubitro
- Log in to the Qubitro Portal.
- Select your project from the list.
- Click New Source.
- Choose Golioth from the available source types.
- A code snippet for the Golioth pipeline will be displayed. Keep this page open—you will use it in the next steps.
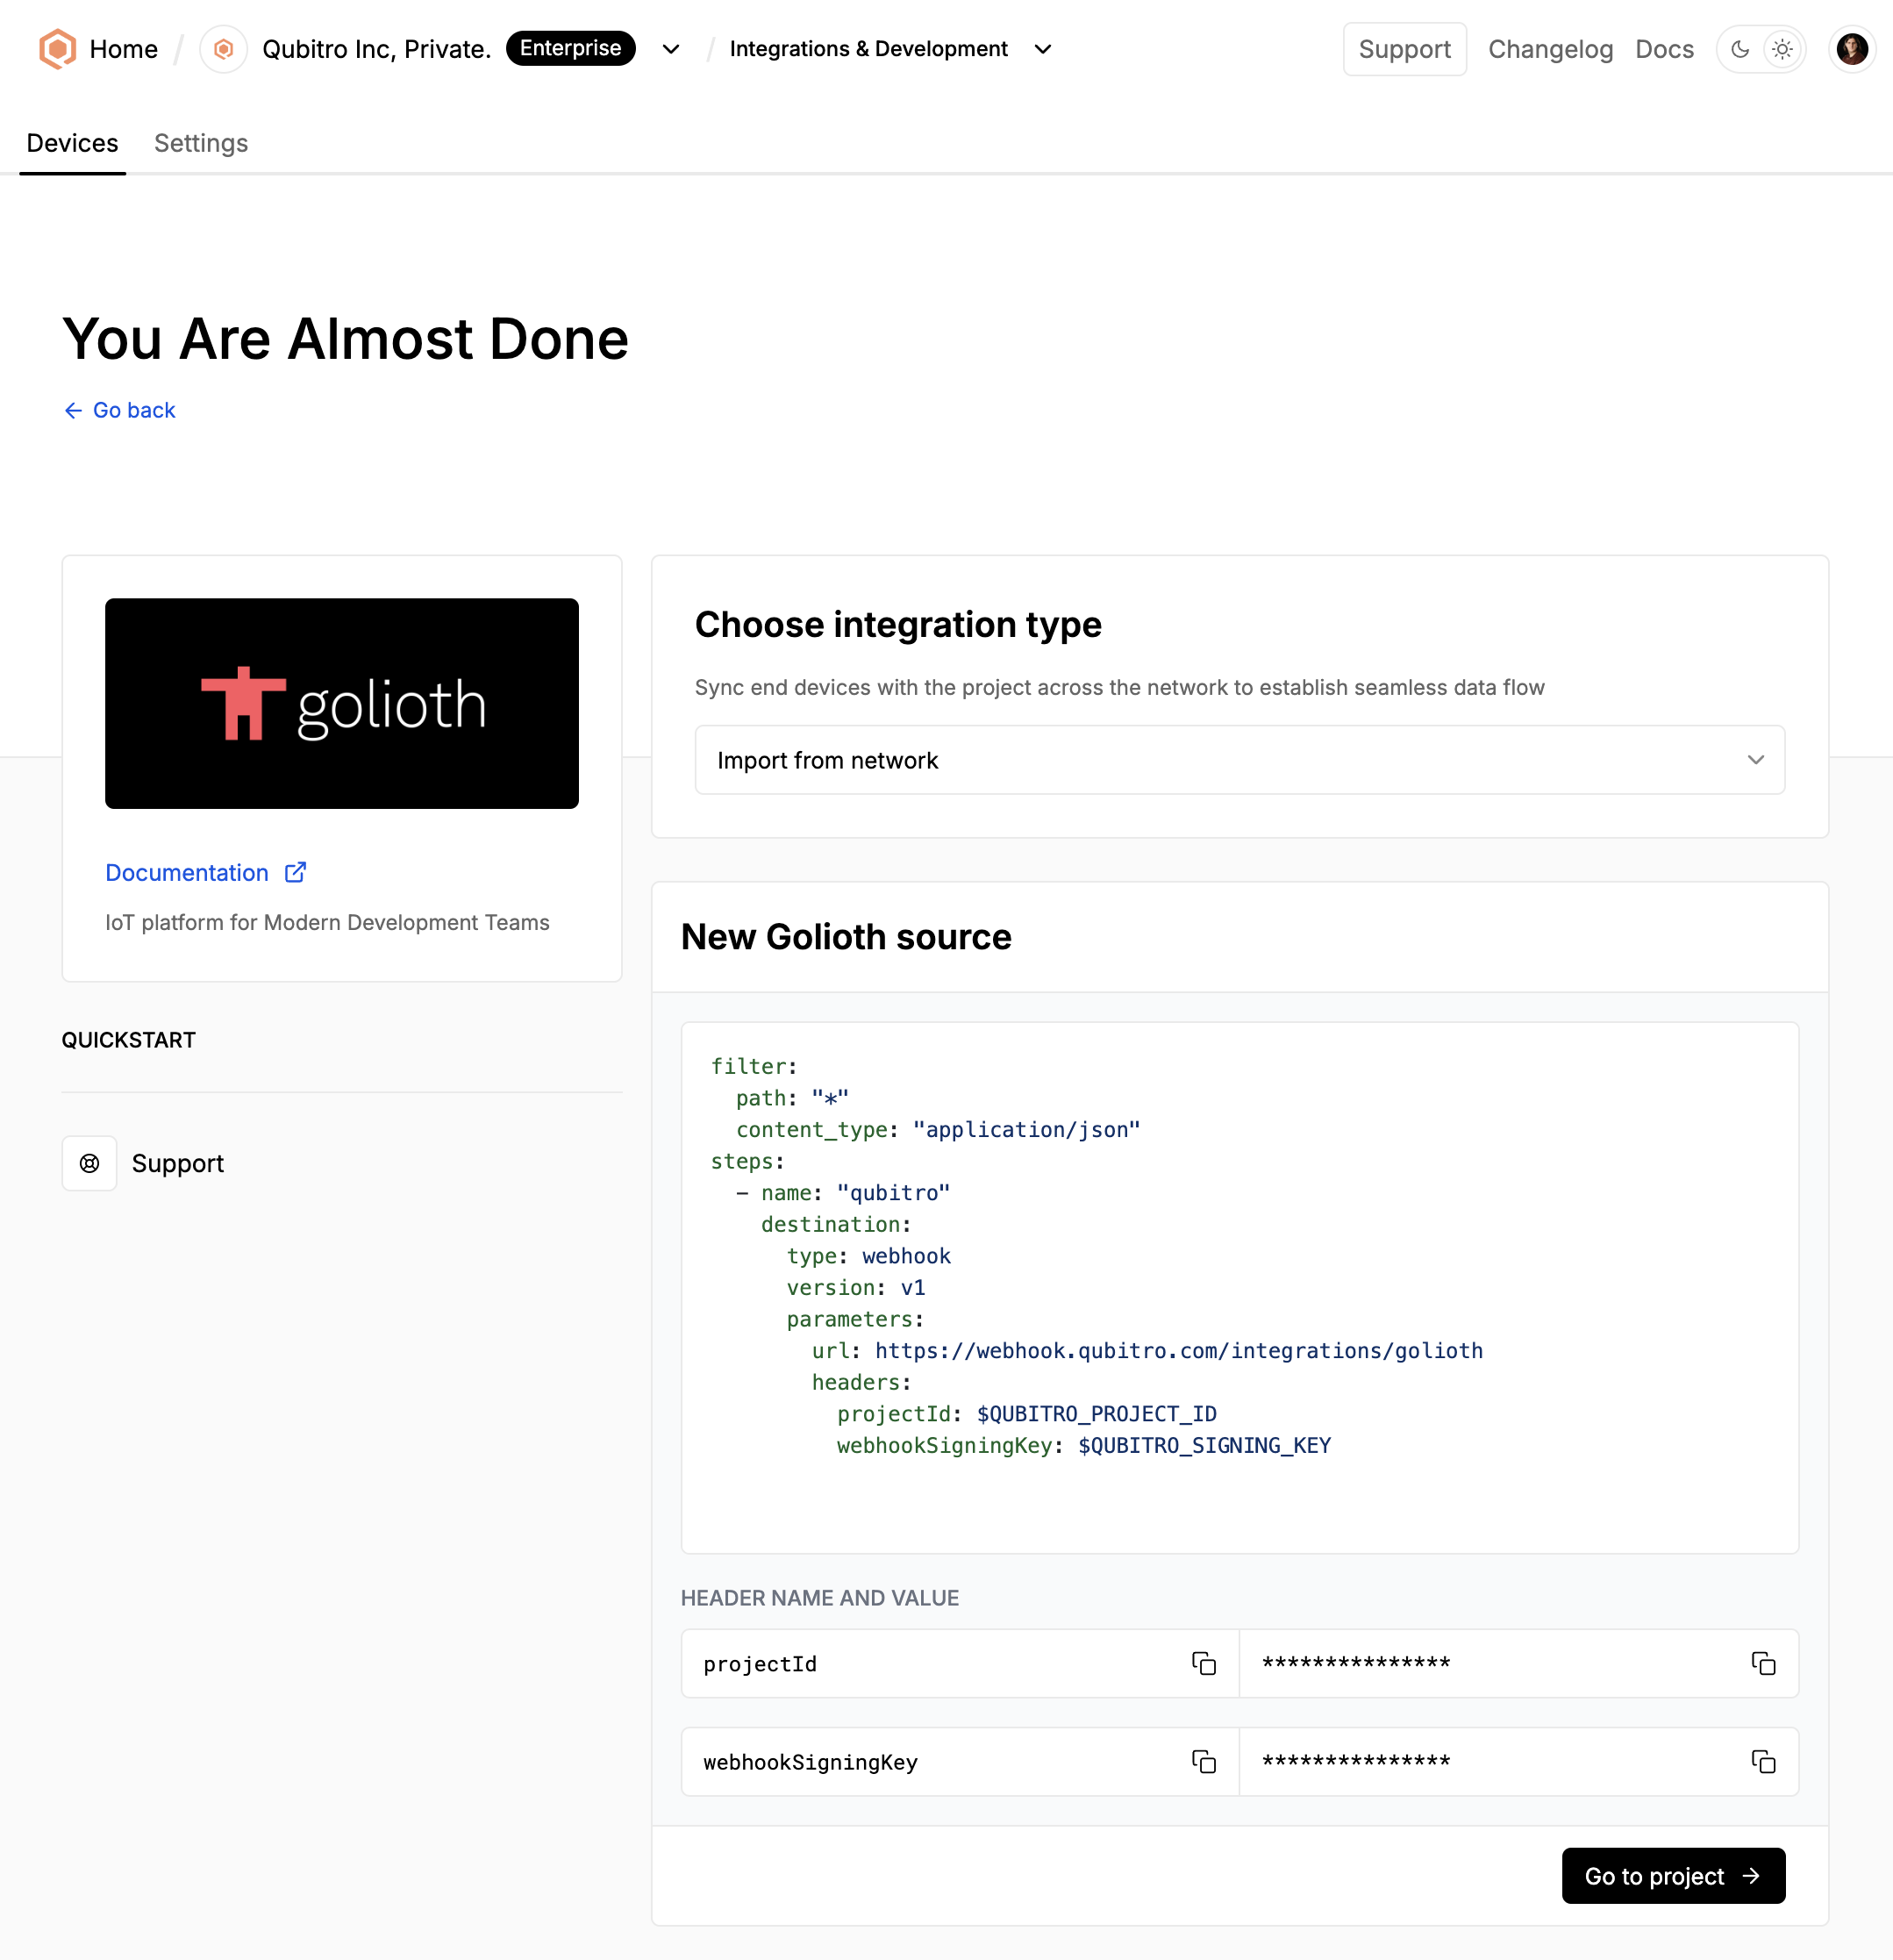
Code snippet:
jsonfilter:
  path: "*"
  content_type: "application/json"
steps:
  - name: "qubitro"
    destination:
      type: webhook
      version: v1
      parameters:
        url: https://webhook.qubitro.com/integrations/golioth
        headers:
          projectId: $QUBITRO_PROJECT_ID
          webhookSigningKey: $QUBITRO_SIGNING_KEY
Create Required Secrets in Golioth
Before configuring the pipeline, create two required secrets in your Golioth account:
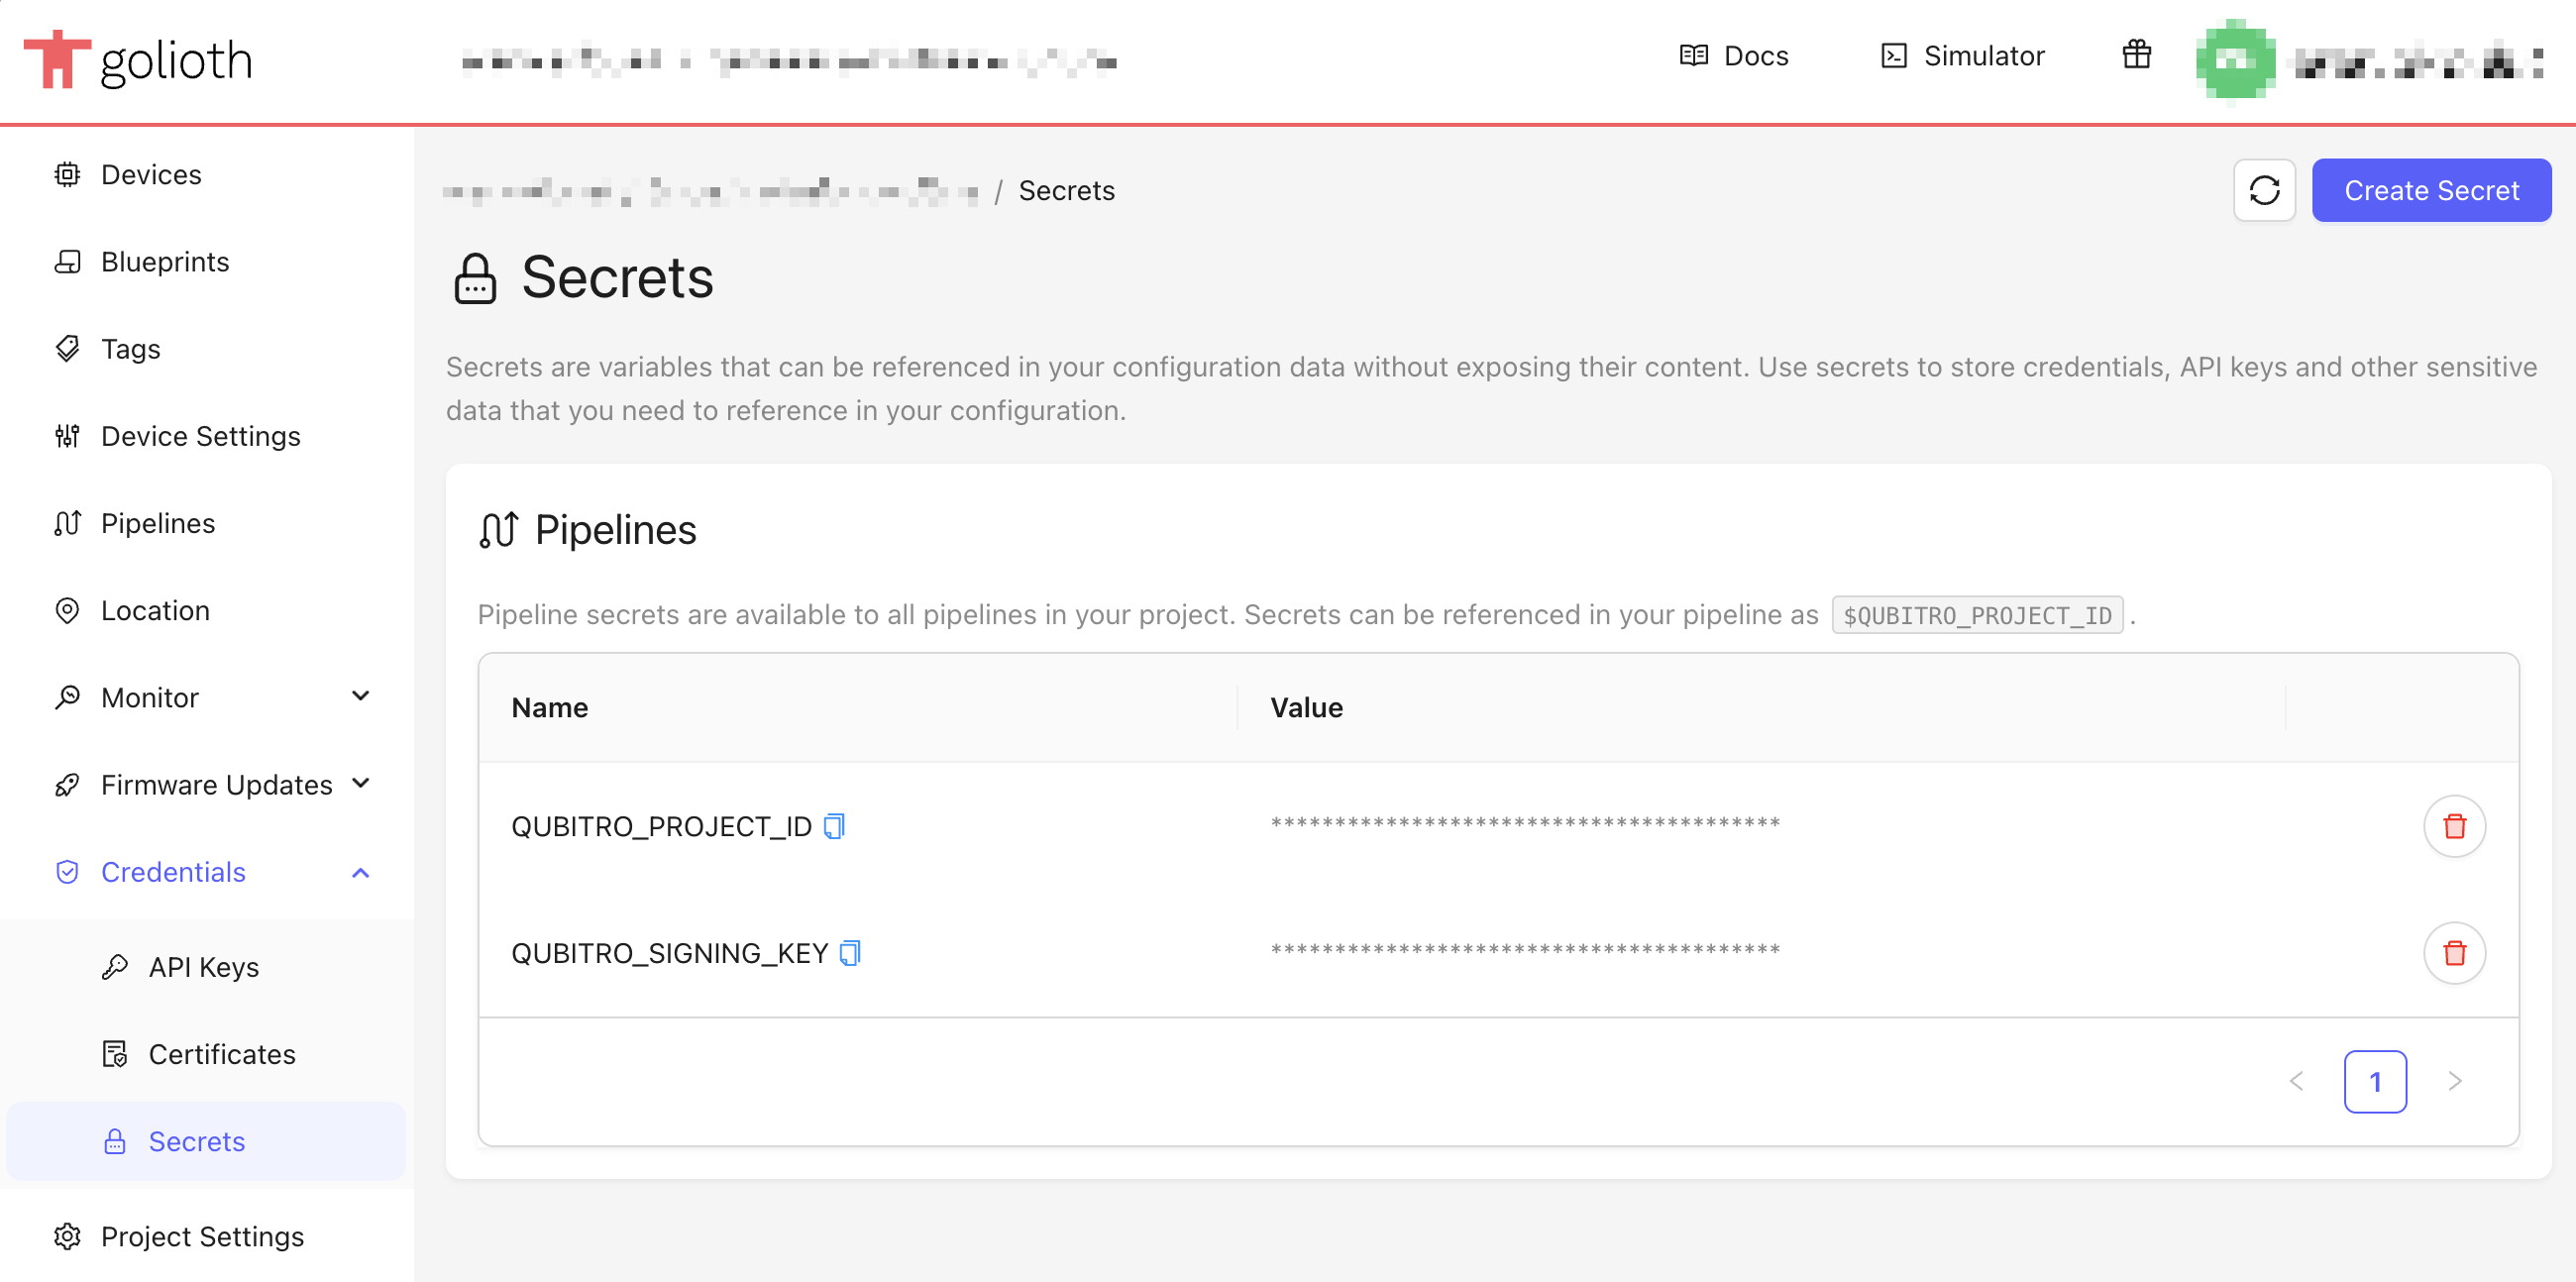
- In the Golioth Console, go to Secrets from the left-hand menu.
- Click Add Secret.
- Add the following environment variables:
QUBITRO_PROJECT_ID: Your Project ID from Qubitro. Also provided in the previous step.QUBITRO_SIGNING_KEY: The webhook signing key found under Credentials in Qubitro. Also provided in the previous step.
Make sure the secrets are saved and available for pipeline use.
Set Up the Golioth Pipeline
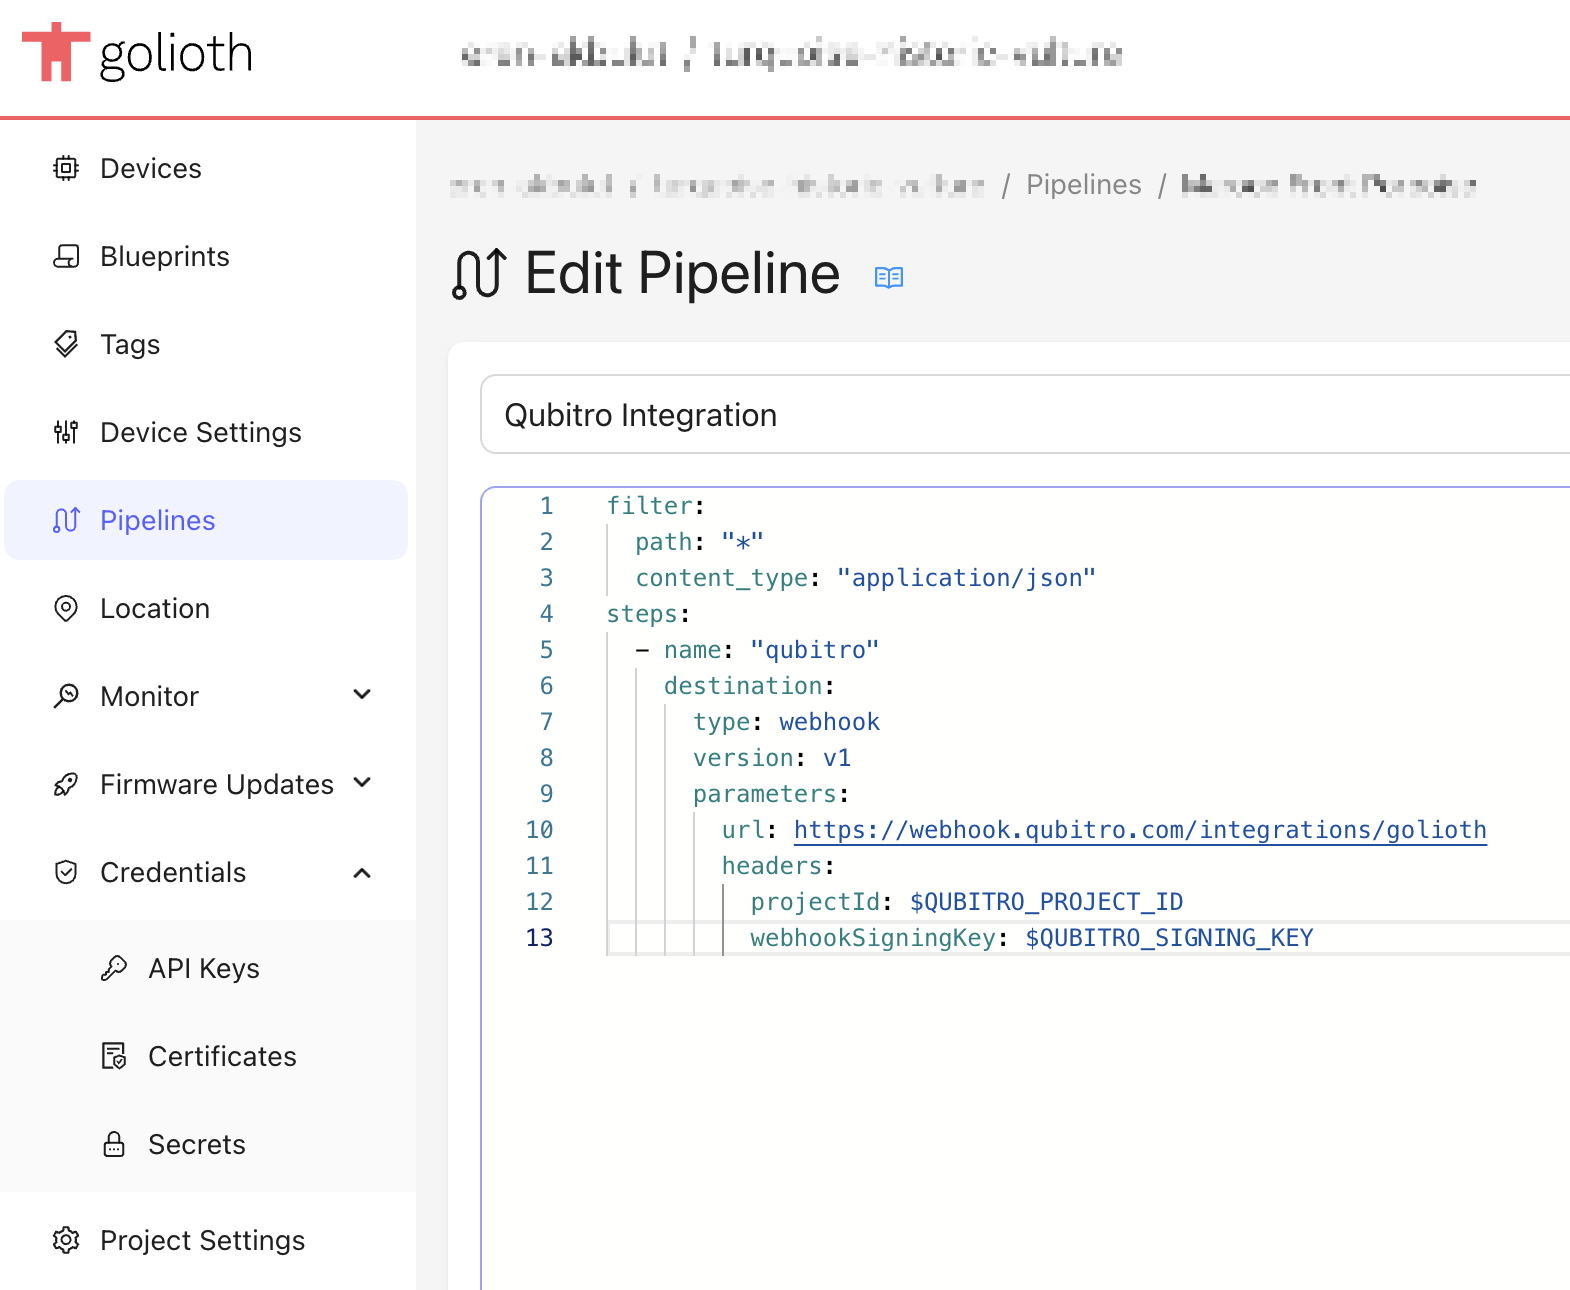
- In the Golioth Console, navigate to Pipelines.
- Click Create.
- Paste the code snippet you copied earlier from Qubitro.
- Make sure the pipeline references the two secrets you created:
QUBITRO_PROJECT_IDQUBITRO_SIGNING_KEY
- Click Create to save and activate the pipeline.
Testing with Golioth Device Simulator
If you don’t have real hardware available, you can use the Device Simulator in Golioth to test the integration.
- In the Golioth Console, navigate to Devices, and choose a device to simulate data.
- Click Open in Simulator and then click Send.
- Once the simulated device sends data, it will be automatically synced to Qubitro and appear in your project.
This is ideal for verifying that the integration is functioning correctly.
Verify the Integration
Return to the Qubitro Portal, go to your project, and click Refresh to fetch new devices.
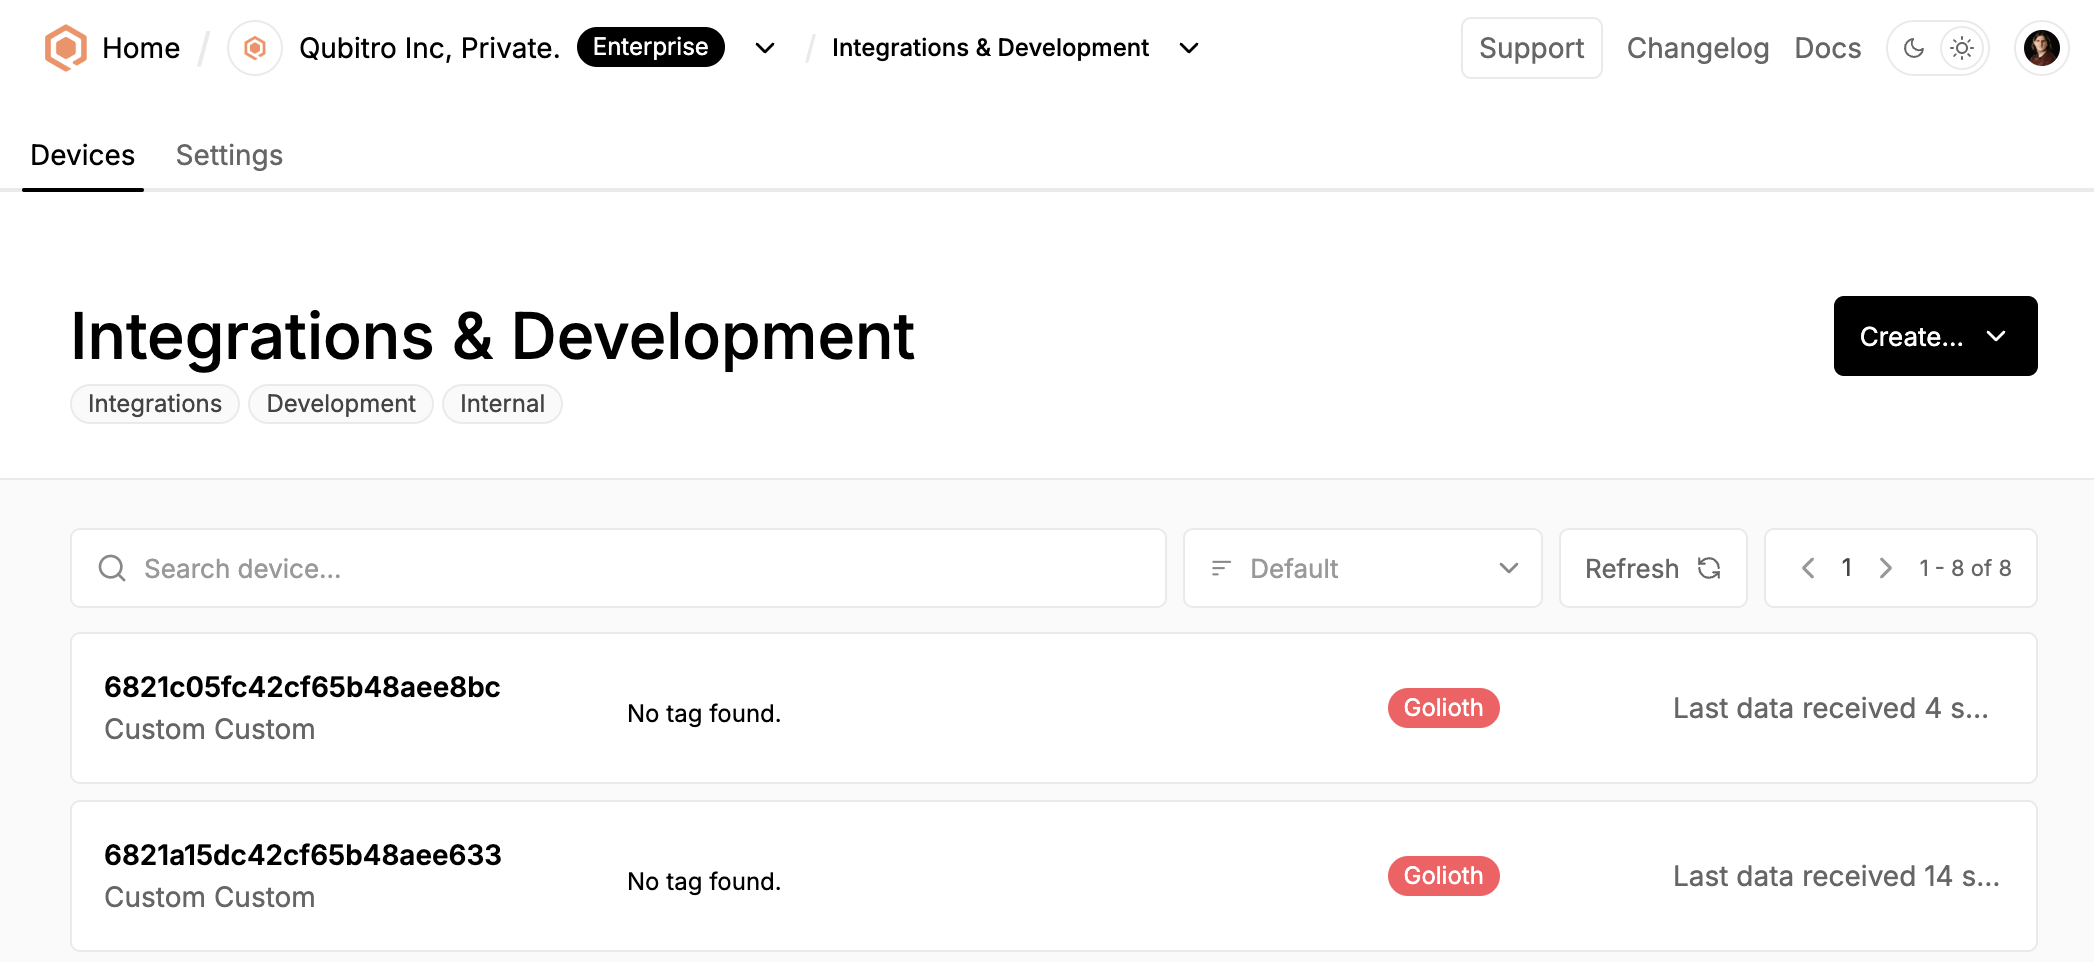
Once devices are listed:
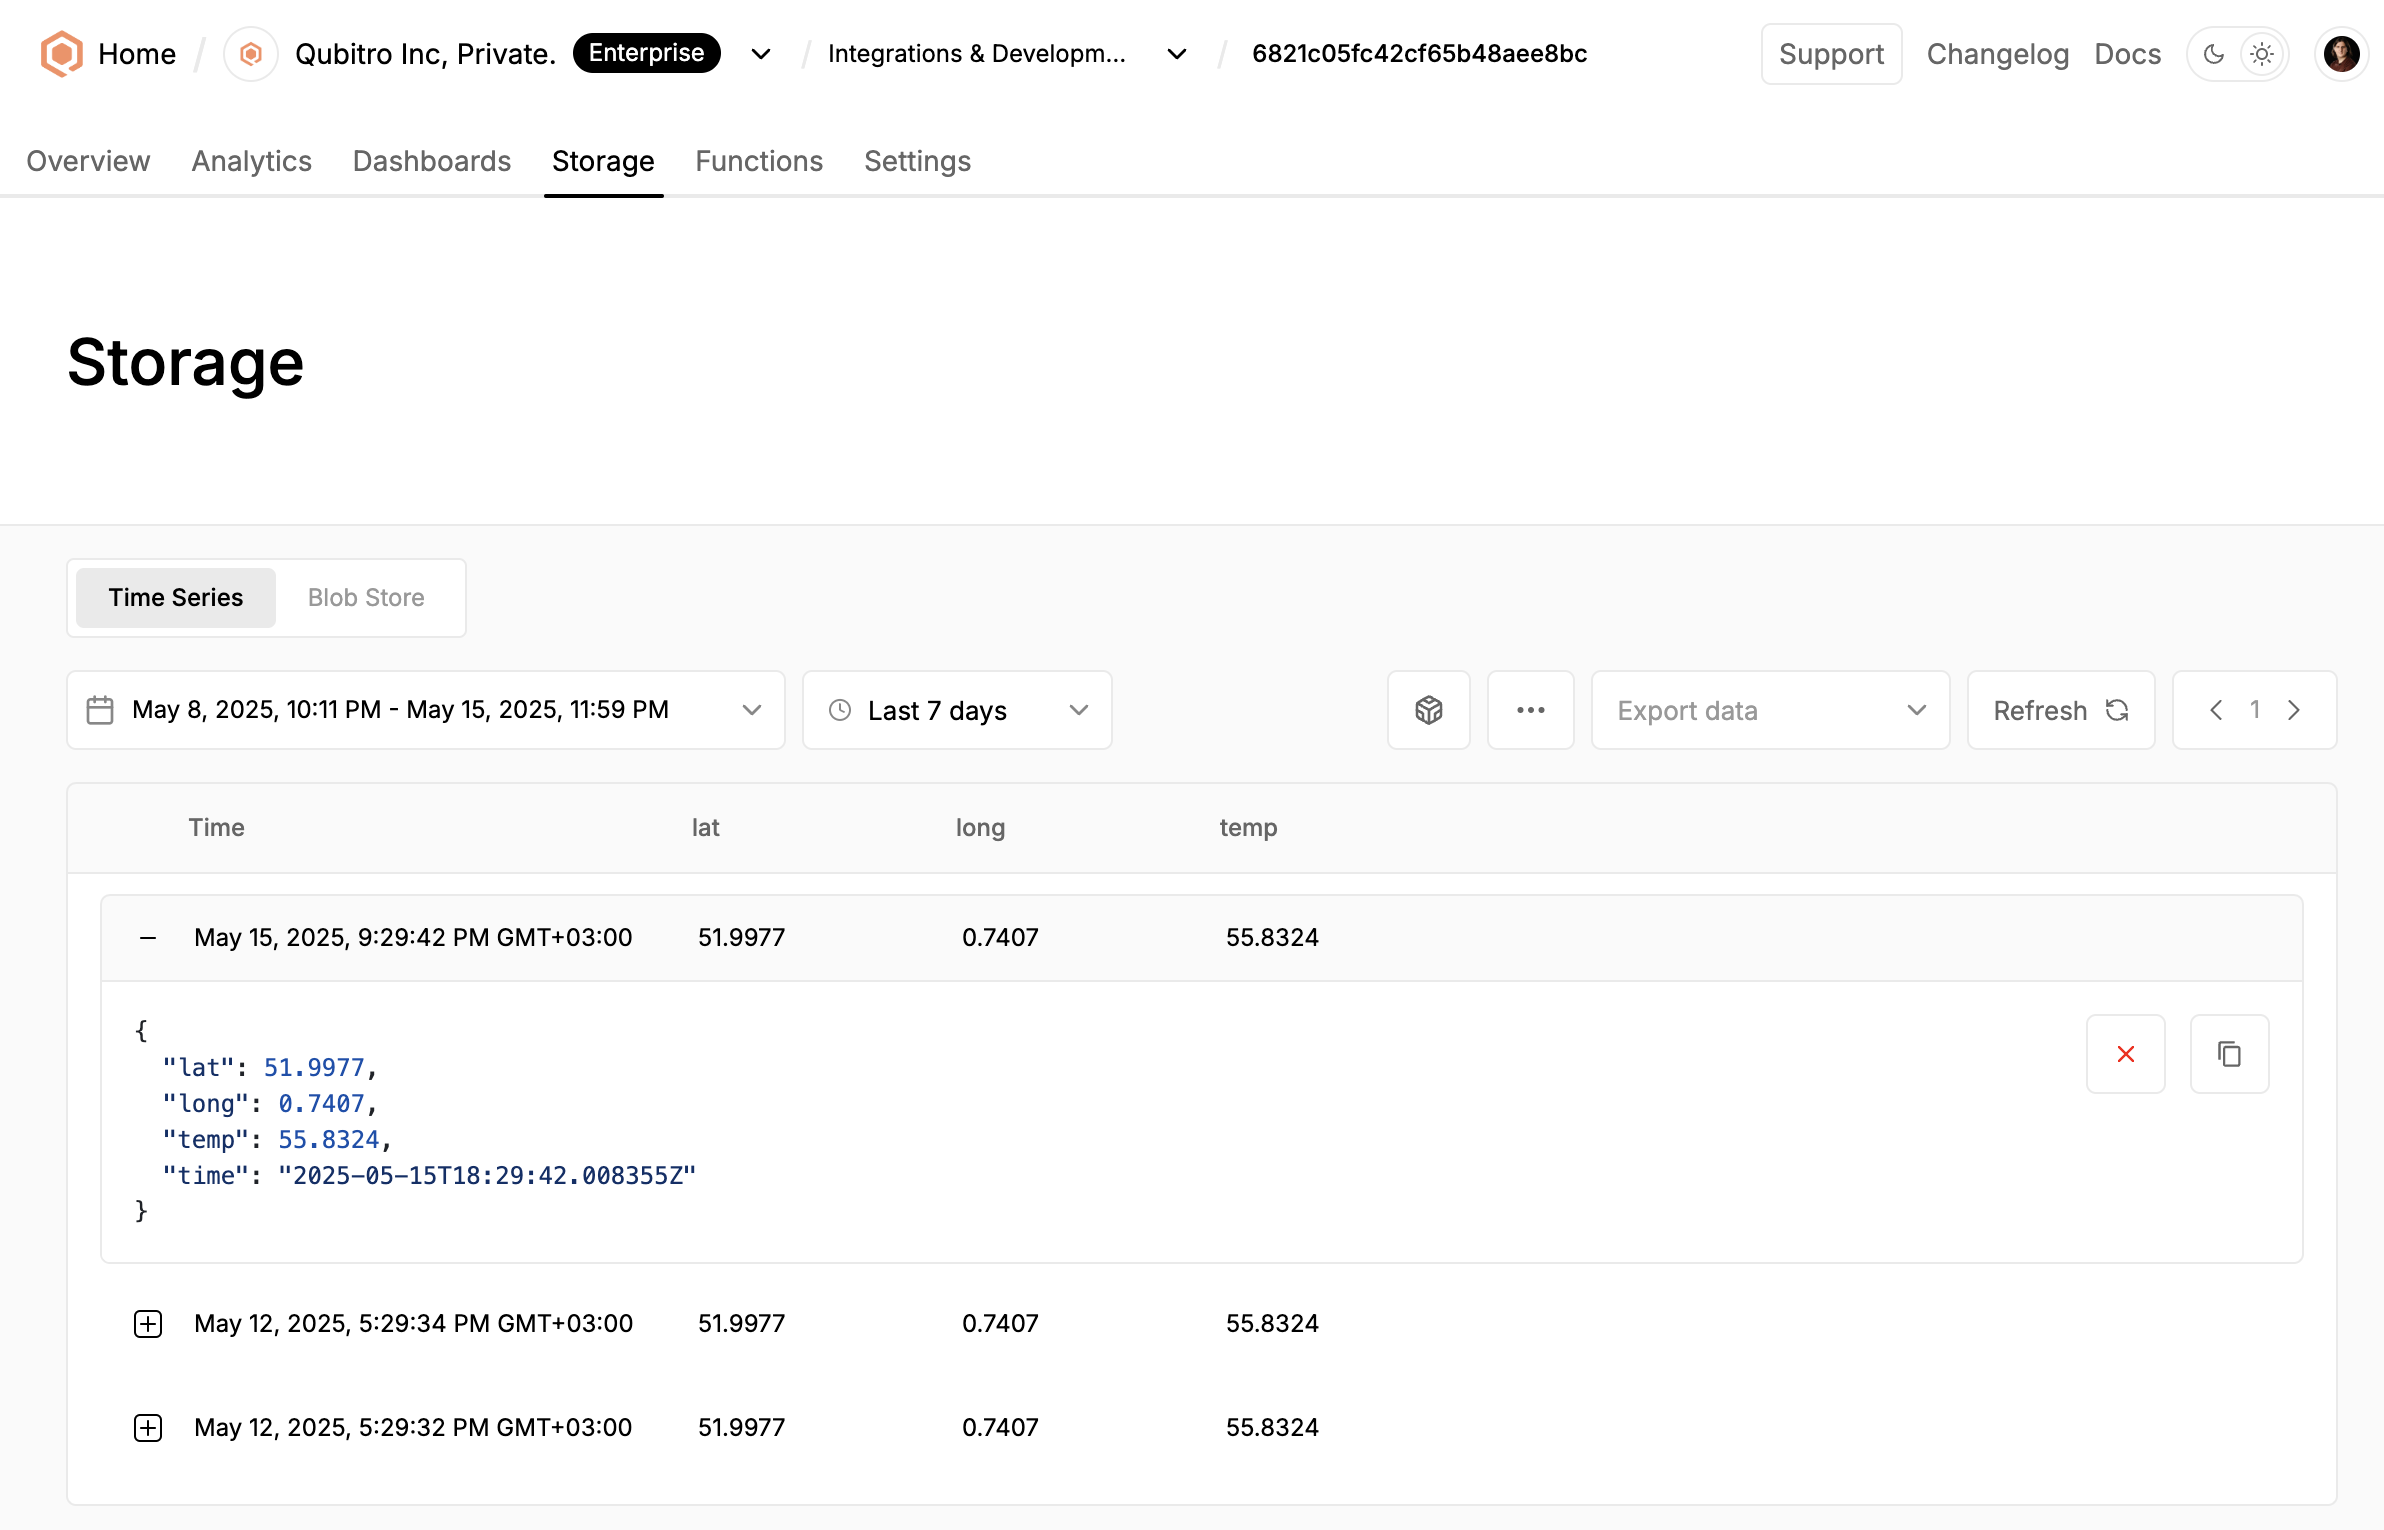
To verify metadata and credentials, visit the device’s Settings tab. To confirm that incoming data is being received and stored, check the Storage tab.
With your Golioth devices now integrated, Qubitro provides the tools you need to build, monitor, and scale your connected solutions—faster and without complexity.